Harry Potter
- Game Information
- Rules Overview
- Layout
- Skill Shots
- School Year Modes / Lessons
- Diagon Alley
- Allies
- Multiballs
- Other Scoring
- Wizard Modes
Game Information & Overview:
- Lead Designer: Eric Meunier
- Code/Rules: Joe Katz
- Mechanical Engineers:
- Artwork:
- Display and Animations: Jean-Paul de Win
- Sound Design: David Thiel
- Release Date: June 2025
- Wiki Rulesheet based on Code Rev: 1.26
- Edit the Code revision, if applicable, when you make changes
Harry Potter is JJP’s 2025 release and Eric Meunier’s fourth table designed for the company. The table is based on Warner Bros’ eight Harry Potter films, following the adventures of a wizard-in-training who attends a school made with them in mind and uncovers the secrets behind the school’s former students and the magic taught by them.
Rules Overview:
- Shoot the scoop to start terms (if one isn’t lit, hit the right spinner to light the scoop). Terms consist of 10 “lessons” and the player will move on to the next lesson if either time runs out during the lesson or they complete the required shots.
- After 10 lessons have been played, shoot the scoop to start final exam. Play six final exam lessons to light the center lane for OWLs multiball.
- Completing 4 lessons is one of three requirements to qualify the Deathly Hallows mini-wizard mode.
- Spell DIAGON at the center lane to qualify one of the Diagon Alley shops. Use the action button or hit Hagrid’s standup target to change the lit shop.
- Shoot the allies target followed by either the inner loop or right orbit to enable super modes. Both ally factions have two super modes.
- Play four multiballs to light Battle of Hogwarts mini-wizard mode.
- Shoot the center and staircase ramps to light Explore Hogwarts multiball.
- Spell HARRY at the inlanes and RON & HERMIONE at their targets to light the wand lock. Lock 3 balls to start Golden Trio multiball.
- Shoot the drop target in front of the Death Eater to start a battle against one. Defeat two Death Eaters to light Death Eater multiball.
- Shoot the left ramp to establish your position for Quidditch matches. Start and complete three Quidditch matches. Then, shoot the left ramp to start Quidditch World Cup multiball.
- After 10 lessons have been played, shoot the scoop to start final exam. Play six final exam lessons to light the center lane for OWLs multiball.
- Complete combos to light the scoop to advance wizard travel. The combo award alternates between timed “geminio” playfield X and other awards.
- Land the ball into the cauldron shot to begin browsing through potions. Shoot the left ramp, center ramp, or right orbit twice to collect the listed award.
- Shoot right orbit repeatedly to light the left outlane for Fawkes ball save. Shoot three lit shots before time runs out to save your ball.
- Light the right outlane for Protego by spelling HARRY while the lock for Golden Trio multiball is already lit. This gate saves any ball about to drain there.
Layout:
| Collector’s Edition | Arcade
| — | — |
| |
|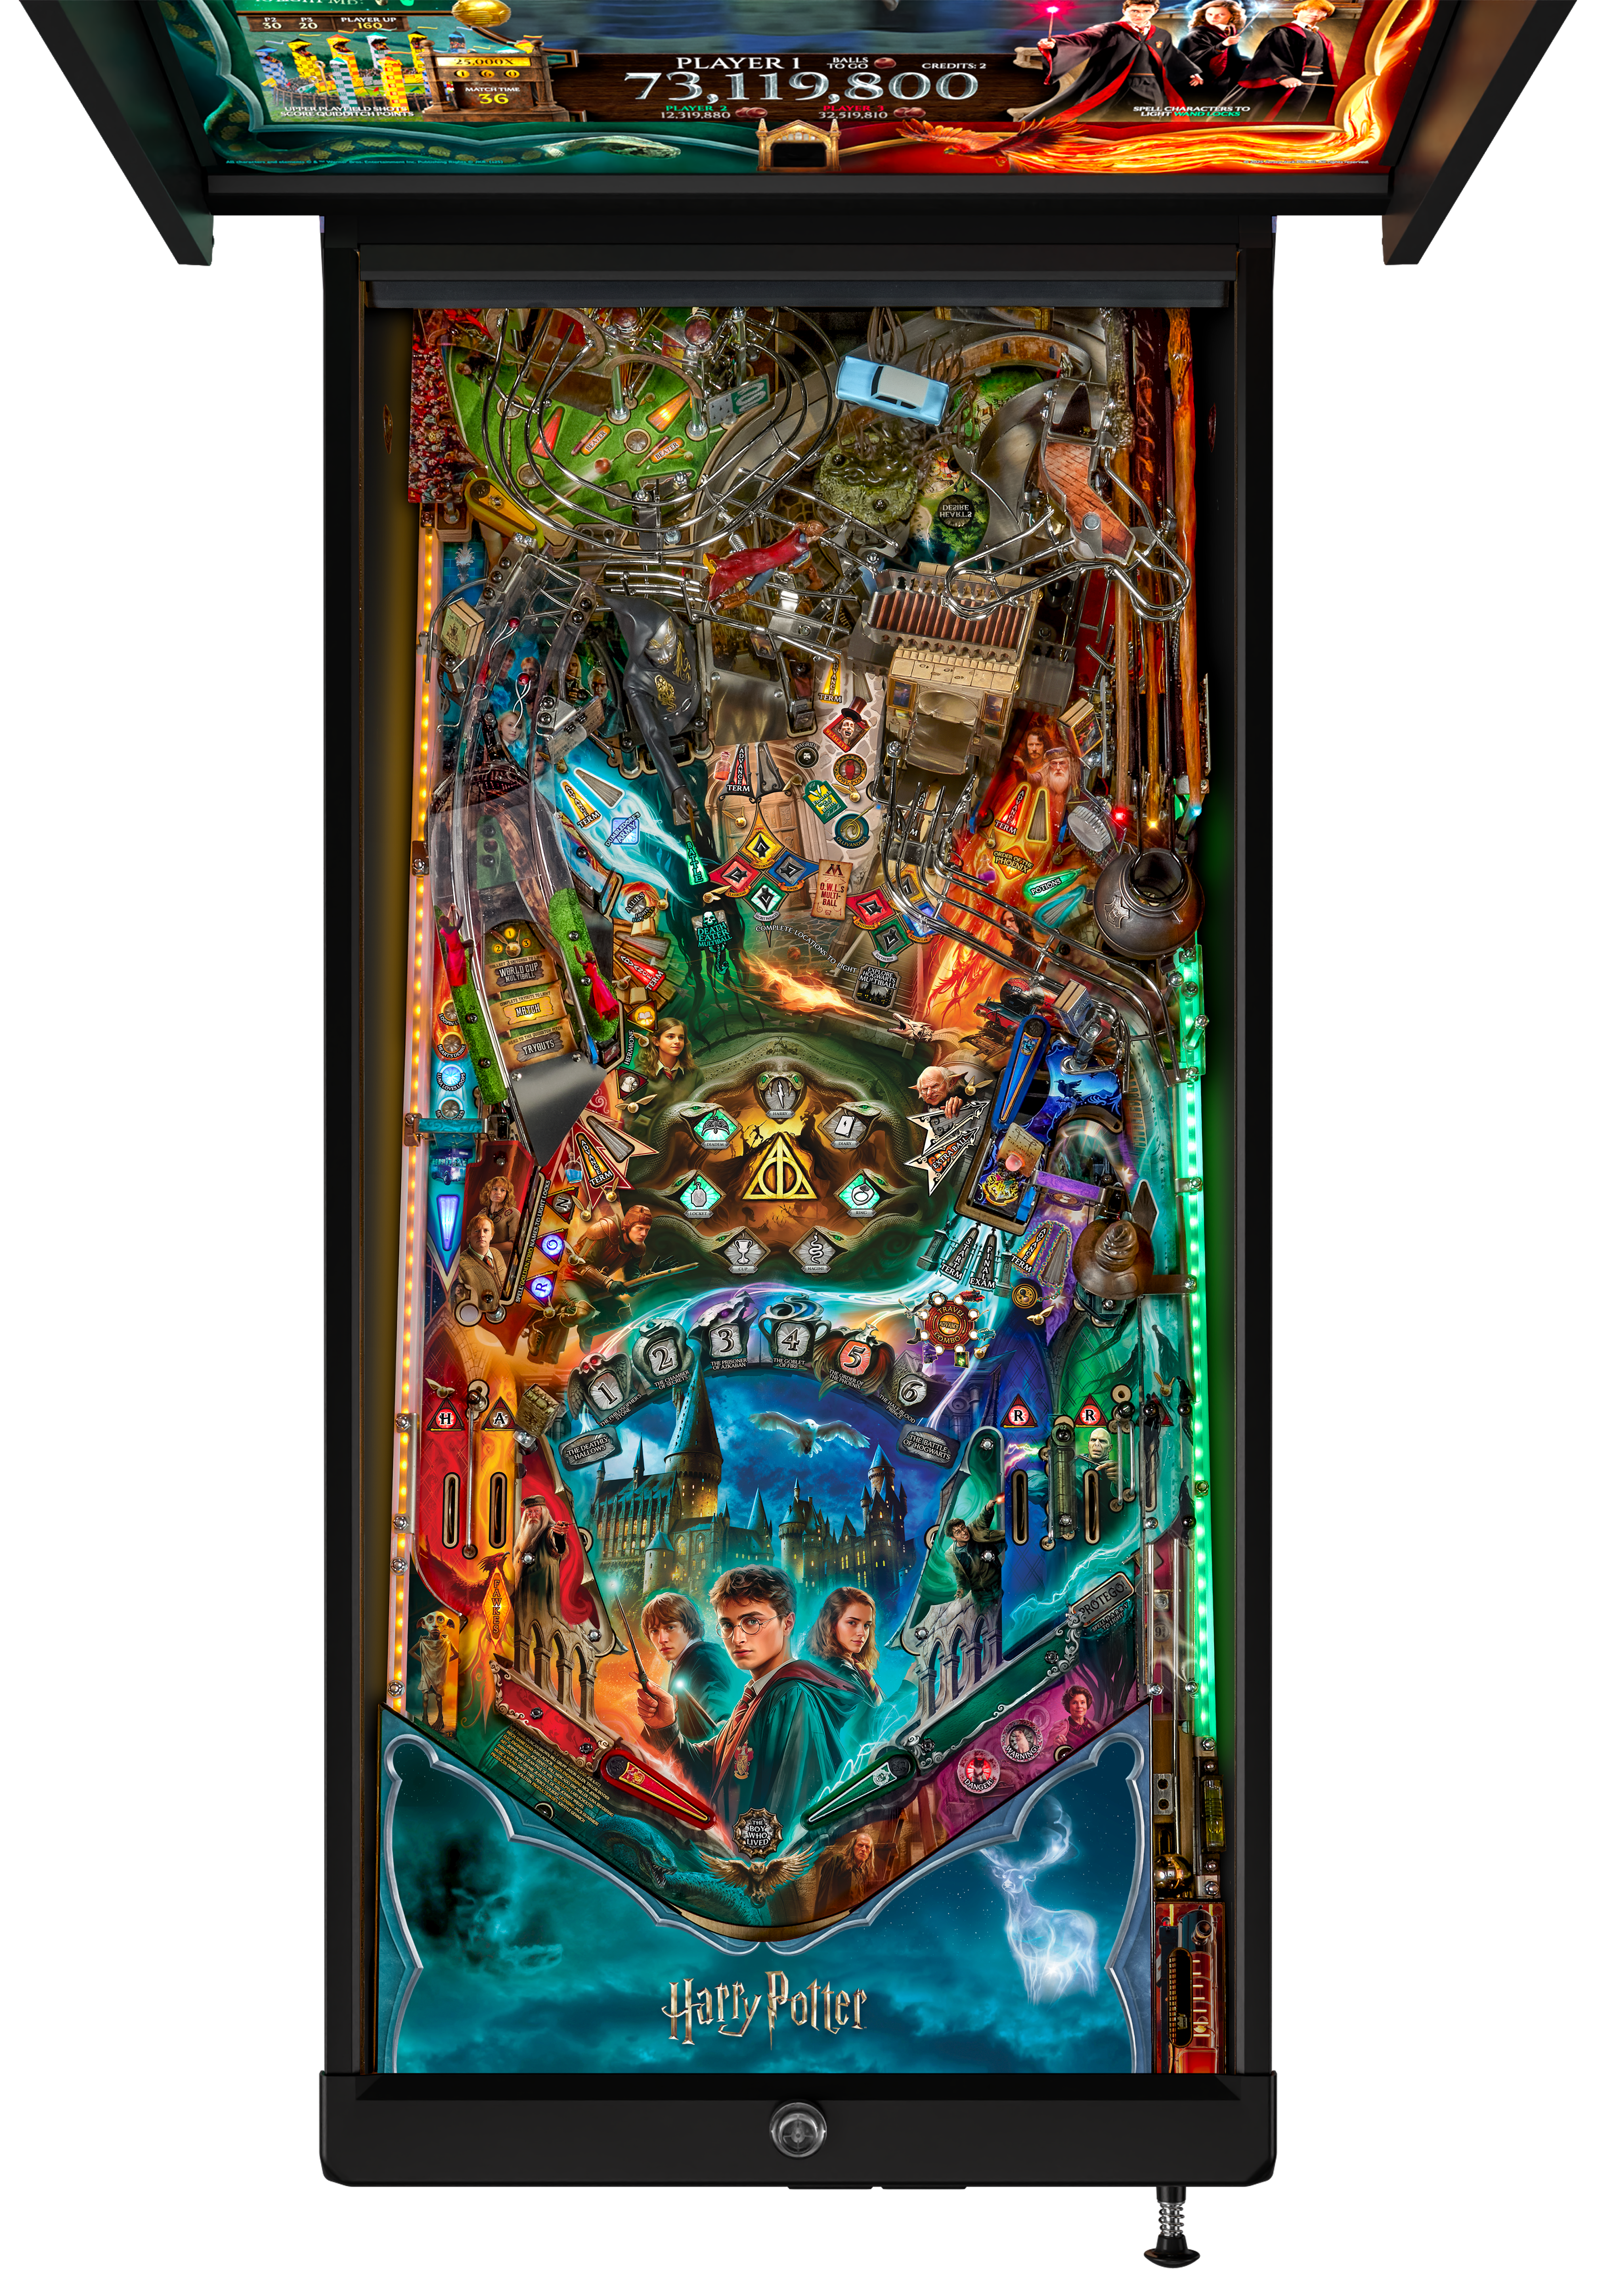 |
|
Skill Shots:
The game starts off with level 1 skill shots available. Once a level 1 skill shot is made, level 2 skill shots will become available, then level 3.
Press the action button to change the lit skill shot.
Level 1:
- Left ramp (advance position to Seeker; start Quidditch match)
- HERMIONE targets (light corresponding Golden Trio multiball lock)
- Death Eater (boost Battle Value)
- HARRY lane (light corresponding Golden Trio multiball lock)
- RON targets (light corresponding Golden Trio multiball lock)
Level 2:
- Center lane (light Diagon Alley)
- Staircase / right ramp (2X next Explore Hogwarts Multiball)
- Right orbit (Increase Character Value)
- Under Flipper (Extra Ball)
- Scoop (3x Wizard Travel Advance)
- Harry lane (Increase Harry Jackpot Golden Trio Multiball Value)
- Ron Target (+1 Bombastic Bomb)
- Hermione targets (Light Potions)
- Left Ramp (Start Quidditch Match)
- Left Ramp (Catch Golden Snitch), only available during a Quidditch Match
- Death Eater (Battle Stays Lit)
- Center ramp
- See Ollivander’s Wand Shop regarding a potential skill shot that can earn you perks for your next Golden Trio Multiball.
Level 3:
- Center lane (+25M to Knockturn Alley Jackpot)
- Dumbledore’s Army and Repeat (Big Points 3,000,000)
- Center ramp (Spot banners)
- Under flipper (Extra Credit Mania)
- Scoop (Add Tilt Warning)
Level ?:
- Right spinner (Spot Hollow / Horcrux?)
School Year Modes / Lessons:
Harry, Ron and Hermione are enrolled at the Hogwarts school of witchcraft and wizardry for 6 years. The year modes reflect this by being a series of 10 mini-modes or “lessons” that end once time runs out or they are completed, concluded by a final exam consisting of another 6 lessons.
Shoot the scoop to start a year when lit, and use the flipper buttons and action button to select the desired year. If “start term” isn’t lit, shoot spinners to light it. The lit shots during lessons are colored red & gold (ie. the Gryffindor house emblem). An hour glass near the upper left corner of the screen indicates how much time is left to complete the current lesson. More time can be added by shooting the right time-turner spinner.
Completing each lesson awards a time bonus (seconds remaining x 25k + 25k per each lesson completed in a row), and completing enough lessons will award random elements (at 2, 3, and 4 lessons played). Completing four lessons during a game is one of the three requirements to light the scoop to start The Deathly Hallows.
Weasley’s Wizard Wheezes can award Bombtastic Bombs that allow players to complete a lesson during any term by pressing the action button.
- Year 1 (Sorcerer’s / Philosopher’s Stone):
- Fall Term:
- Privet Drive [Right orbit 1x, Hagrid target, any HARRY lane]
- No Post on Sunday [any 2 red/gold shots, ?];
- Ollivander’s [2 center lanes, ?]
- Platform 9 3/4 [2 RON targets, library ramp]
- Hogwarts Express [any RON target, 2 HERMIONE targets, ?]
- Spring Term:
- Sorting Hat [Center ramp, 20 right spins]
- Winguardium Leviosa [red/gold shot, HERMIONE target, ?]:
- Troll Fight [Ron target, ?, ?, ?];
- Norbert [2 Hagrid target hits, ?];
- Fluffy [right ramp, ?, ?];
- Final Exam:
- Devils Snare 1 [inner loop, ?, ?];
- Devils Snare 2 [right spinner, ?, ?];
- Flying Keys [left ramp, ?];
- Wizard Chess 1 [2 right ramps, inner loop];
- Wizard Chess 2 [R target, O target, N target];
- Mirror of Erised [3 red/gold shots, ?, ?, ?]
- Fall Term:
- Year 2 (Chamber of Secrets):
- Fall Term:
- The Flying Car [2 RON targets, inner loop]
- The Whomping Willow [8 jet hits, red/gold shot]
- Blue Cornish Pixies [3 of any (blue) shot, Hermione targets]
- The Rogue Bludger [left ramp, upper playfield ramp, ?]
- The Dueling Club [20 right spins, right orbit]
- Spring Term:
- Polyjuice Potion [2 center ramps];
- Follow the Spiders [2 shots to either left ramp, center lane, or right orbit];
- Meeting Aragog [2 under-flipper shots];
- Spiders Attack [2 shots to either inner loop or library ramp];
- Car Rescue [Center lane, Center ramp, ?];
- Final Exam:
- The Chamber of Secrets [Center ramp, ?];
- Opening the Chamber;
- Heir of Slytherin;
- The Basilisk;
- Sword of Gryffindor;
- The Diary
- Fall Term:
- Year 3 (Prisoner of Azkaban):
- Fall Term:
- Aunt Marge’s Big Mistake [any 3 red/gold shots];
- The Knight Bus [any 3 red/gold shots];
- The Monster Book of Monsters [20 spins of red/gold spinners];
- The Dementor [right orbit, ?, ?];
- Boggart in the Wardrobe [2 inner loops, ]
- Spring Term:
- The Patronus [?, right orbit, inner loop];
- That Felt Good [Hermione targets, ?, ?, ?];
- The Shrieking Shack [stairs for jets: 10 jets, library ramp];
- Sirius Black [right orbit, ?, ?, ?];
- The Dementor’s Kiss [any Harry lane, , , ]
- Final Exam:
- The Time Turner [Hermione targets, ?];
- Nice Punch [Death eater, ?];
- Onlookers to the Rescue [center lane target, ;
- Saving Lives [any 3 red/gold shots];
- Forest Chase [2 center ramps, ?];
- Truly Seen Truly Free [stairs, center lane, center ramp, inner loop]
- Fall Term:
- Year 4 (Goblet of Fire):
- Fall Term:
- Port Key [3 RON or HERMIONE targets, left ramp]
- The Dark Mark [Death Eater, any 2 red/gold shots]
- The Triwizard Tournament [any 4 red/gold shots]
- The Four Champions [any 4 red/gold shots];
- Transforming Malfoy [Death Eater, any Harry lane, any red/gold shot]
- Spring Term:
- The First Task 1 [Center lane, inner loop, ?];
- The First Task 2 [Right orbit, center lane, any red/gold shot];
- The Second Task 1 [any 3 red/gold shots];
- The Second Task 2 [any Harry lane, any Harry lane, any red/gold shot];
- The Third Task [any red/gold shot, ?, ?]
- Final Exam:
- Blood of the Enemy [Death Eater, ?, ?];
- Reborn;
- The Death Eaters;
- Almost Forgotten You Were Hear;
- Duel;
- Power Struggle
- Fall Term:
- Year 5 (Order of the Phoenix):
- Fall Term:
- Dementor Escape
- 12 Grimmauld Place
- The Ministry of Magic
- The High Inquisitor
- Dumbledore’s Army
- Spring Term:
- Occlumency
- Unquiet Escape
- Grawp
- Snape’s Worst Memory
- Out of the Fire
- Final Exam:
- Fight & Flight
- Department of Mysteries
- Beyond the Veil 1
- Beyond the Veil 2
- Side by Side 1
- Side by Side 2
- Fall Term:
- Year 6 (Half-Blood Prince):
- Fall Term:
- Under Attack [3 center lanes];
- Horace Slughorn [3 right orbits];
- Draco’s Detour [3 Death Eater or center lane shots];
- That’s For My Father [2 center / left shots, Death Eater];
- The Half-Blood Prince
- Spring Term
- How It Feels
- The Death Eaters Attack
- Perilous Potions
- The Vanishing Cabinet
- Sectumsempra
- Final Exam:
- The Cave 1
- The Cave 2
- Inferi Attack
- The Astronomy Tower
- Hogwarts in Peril
- Together as One
- Fall Term:
O.W.L.s Multiball:
After the Final Exam for any of the six years has been played, shoot the center lane to start O.W.L.s (Ordinary Wizarding Level) Multiball. O.W.L.s Multiball is a 2-ball multiball with a 30-second ball saver. The base jackpot value is determined by the number of lessons completed during the school year and the Final Exam. (Ex. When 8 lessons were completed, the base jackpot value was 19M.) Each spell completed at Flourish & Blotts (before playing O.W.L.s multiball) adds +1x multiplier to all points scored in O.W.L.s Multiball.
Shoot 5 red jackpot shots to light super jackpot. 65 switches lights triple jackpot.
Diagon Alley:
Access the shops at Diagon Alley by shooting the center lane three times (+1 per shop, to a maximum of six shots). There are five shops to visit and the lit one can be changed either indirectly by hitting the Hagrid target near the center lane, or directly by pressing the action button.
- Ollivander’s Wand Shop: 30-second timed mode, shoot the lit double shots to boost Golden Trio multiball as follows: 1) Longer Ball Save, 2) Jackpots Increased, 3) Easier Wand Jackpots, 4) 2x and 3x Jackpot Combos, 5) Auto Restart. If you lock a ball with Olivanders lit but not collected and you get to plunge, you can choose to attempt the center lane skill shot which will spot the first 2 shots when you start Ollivander’s (i.e., you are spotted the “Longer Ball Save” and “Jackpots Increased” perks). Since the Cup horcrux obtained by collecting a super jackpot in Golden Trio multiball is widely considered the most difficult horcrux, getting all of the perks including Auto Restart can be a big help if you want to reach The Boy Who Lived (Wizard Mode).
- Flourish & Blotts: Video mode. Memorize the spells which require flipper buttons or action button inputs in the correct order. Completing this video mode awards the Diary horcrux.
- Owl Post: Lights a random hurry-up shot for a value starting at 50M. The VUK will send the ball to whichever flipper is best suited to make the lit shot.
- Weasley’s Wizard Wheezes: Awards 10M and +2 Bombtastic Bombs. During lessons, pressing the action button will use up the Bomb and complete the currently active lesson.
- Borgin & Burkes: Can only be visited if the Knockturn Alley value has been built up over the course of the game’s four multiball modes. Accessing this shop awards the built Knockturn Jackpot value.
Allies:
Shoot the allies target below the inner loop to qualify timed modes at the inner loop and right orbit. Each timed mode takes more and more hits to the allies target to light. Collecting 10 allies through the target (playing all 4 timed modes in the process) awards the Locket horcrux.
The four timed modes are:
- Luna Loves Loops (started at inner loop): Repeat the inner loop shot as many times as possible within 30 seconds. Repeated shots add to the value.
- Hexes & Jinxes (started at inner loop): All three spinners (left, upper playfield, and right) score 10k per spin and increase with every rip & unique spinner made.
- Loopin’ Lupin (started at right orbit): Repeat the right orbit shot as many times as possible within 30 seconds. Repeated shots add to the value.
- Heart’s Desire (started at right orbit): Feed the bumpers through the center lane or staircase shots for increasing values per visit. The Mirror of Erised will show the player on the display in this mode.
Multiballs:
Explore Hogwarts Multiball:
To qualify Explore Hogwarts multiball, you must spot (i.e., lower) all eight banners displayed at the top of the LCD screen. The banners on the left are blue, yellow, red, and green and correspond to the inserts of the same colors below the center ramp. The banners on the right are green, red, yellow, and blue and correspond to the inserts of the same colors below the right ramp.
Shooting the center ramp will spot the banner(s) of the indicated color on the left side, or on both sides for your first Explore Hogwarts multiball. Similarly, shooting the right ramp will spot the banner(s) of the indicated color on the right side, or on both sides for your first Explore Hogwarts multiball. Once all eight banners have been spotted, the right ramp will start Explore Hogwarts multiball.
Since both green banners and both yellow banners are spotted at the beginning of the game, it is possible to qualify your first Explore Hogwarts multiball with as few as two ramp shots (if you can shoot one ramp shot to spot both red banners and another ramp shot to spot both blue banners.)
During Explore Hogwarts multiball, many shots are lit to score one of four jackpots: Secret Passages, Classrooms, Castle Grounds, or Towers jackpots. Shooting any jackpot unlights that shot. Collect four jackpots to light super jackpot at a roving shot (from left to right). Shooting additional jackpots increases the value of the super jackpot. Shooting the super jackpot collects the Ring horcrux. After shooting the super jackpot, the process repeats.
The super jackpot will remain lit after the multiball ends if a super jackpot hasn’t been scored yet.
The Hagrid standup target (between the center ramp and the center lane) will light green for add-a-ball after shooting 2 jackpots.
Golden Trio Multiball:
Light the wand lock at the right orbit and inner loop by completing the spellouts for each member of the Golden Trio.
- HARRY: Complete the return lanes (or make the level 1 Harry skill shot).
- RON: Complete the left standup targets (or make the level 1 Ron skill shot).
- HERMIONE: Spell Hermione by repeatedly shooting either standup target between the left ramp and the library ramp (or by making the level 1 Hermione skill shot).
Each spellout lights one lock. Once three balls are locked at the wand, Golden Trio multiball will start.
Intro screen normally gives this summary: “Make 3 shots for each Golden Trio member with relight at their name. Collect wand jackpot for each. Re-lock balls to light super jackpot for cup horcrux.”
But if you have earned “Easier Wand Jackpots” at Ollivander’s Wand Shop in Diagon Alley then the Intro screen will instead say, “Make 2 shots for each Golden Trio member….”
To elaborate…
There are three jackpot types: blue jackpots (for Ron on the left), red jackpots (for Harry in the center), and yellow jackpots (for Herminoe on the right). After collecting a blue jackpot, hitting a Ron target will relight blue jackpots. Similarly, after collecting a red jackpot, any Harry lane will relight red jackpots. After collecting a yellow jackpot, hitting a Herminoe target will relight yellow jackpots.
Scoring three jackpots of the same color (or two jackpots of the same color if you have earned “Easier Wand Jackpots” at Ollivander’s Wand Shop) will light the right orbit, center lane, and inner loop for wand jackpot. If you are down to two balls, then scoring a wand jackpot will add a ball. The second wand jackpot scores 2x and the third wand jackpot scores 3x.
After scoring your third wand jackpot, you have 45 seconds to both:
A) lock the remaining balls on the wand (after which one will be released), and then
B) shoot a randomly chosen shot for super jackpot and the Cup horcrux.
The process then resets with more jackpots required to light wand jackpots.
See Ollivander’s Wand Shop regarding perks you can earn for your next Golden Trio Multiball.
Death Eater Multiball:
Shoot the left drop target to light Death Eater battle. During the battle, shoot the hole behind the drop target two times in 20 seconds to score 20M and defeat the Death Eater (and light extra ball the first time one is defeated during a game). Defeating the second Death Eater will light the hole to start Death Eater multiball and kill the flippers. All other game rules are disabled while Death Eater multiball is running.
Death Eater Multiball intro screen says: “Hit D.E. for hurry-up value. Defeat 4 Death Eaters. Hit Purple Super Jackpot 1X, 2X, 3X. Shoot timed frenzy red shots. Collect on Death Eater.”
Death Eater Multiball is split into four stages:
- Hurry-up: the value starts at 1M. At thresholds of 800k and 400k, the number of death eaters that must be killed during the multiball decreases by 1.
- Jackpots: green shots score the locked in hurry-up value and decrease the health of each death eater by 1/2.
- Super jackpots: shoot any shot on the right (scoop, right spinner, behind flipper) for 5M x the number of death eaters that were killed.
- Frenzy: all red shots score ?
Quidditch World Cup:
At the start of the game, the very first left ramp shot will start Quidditch tryouts. This mode can only be activated once per game - hitting the upper playfield target twice, the ramp twice, the loop (spinner) twice, or the snitch / broom shot (which exits the upper playfield to the center ramp to the rotating staircase) once will advance the player’s Quidditch position (from worst to best: beater, chaser, keeper, seeker). After Quidditch tryouts, the player’s Quidditch position can only be advanced by shooting the snitch / broom shot or via the appropriate potion. Your Quidditch position dramatically affects your Quidditch Bonus.
After Quiddich tryouts, make enough spinner hits on the upper playfield to start a Quidditch match. A Quidditch match lasts until you catch the “Golden Snitch” (by any method described in the bullet points below), drain, or the match times out (40 seconds for 1st match, 30 seconds for second match…). A random shot’s snitch insert will light for a few seconds before roaming to an adjacent shot (easier) or just “teleporting” to any other random shot (harder). (There are 21 tiny snitch inserts on the main playfield and 3 on the upper playfield.) To catch the snitch and successfully complete a match you need to either:
- Shoot the lit snitch insert during a match (with the difficulty increasing every match), or
- Shoot the left ramp skill shot during a Quiddich match, or
- Immediately after tryouts and before the ball exits the upper playfield, start a Quiddich match via the spinner, followed by immediately shooting the difficult snitch / broom shot on the upper playfield (with a very late & strong mini-flipper shot that exits onto the center ramp to the back of the rotating staircase). If you manage this, you will have completed tryouts, started a match, and caught the snitch all during a single visit to the upper playfield.
Catching the “Golden Snitch” earns 150 Quidditch points (see The Resurrection Stone and Quidditch Bonus regarding Quidditch points). Also, during a match, each ramp shot on the upper playfield scores a goal which earns 10 Quidditch points.
After completing three matches (one against each rival house), the next left ramp shot will start Quidditch World Cup multiball.
Onscreen intro text for Quidditch World Cup multiball says: “Hit 5 jackpots to light loopable super jackpot on upper playfield for Diadem horcrux. Switch team jackpots via left ramp for increased value.”
During Quidditch World Cup multiball, shooting green shots scores jackpots. Shooting the left ramp will switch the jackpots shots to red, which score somewhat more than green jackpots. (The green colors represent the Ireland Quidditch team, and the red colors represent the Bulgaria Quidditch team.) After scoring enough jackpots (five the first time, ? the second, etc.) all jackpot shots will turn to increasing the value of the super jackpot, scored with one or more (i.e., loopable) shots to the ramp on the upper playfield with a multiplier that increases every time the ramp shot is made (i.e., looped). Scoring the super jackpot also earns the Diadem horcrux. An add-a-ball seems to be available from the upper playfield at some point.
Other Scoring:
Wizard Combo Travel (Geminio / Playfield X)
Shooting lit shots in quick succession around the playfield awards combos and progresses towards lighting one of the inserts in front of the scoop. Once this insert is flashing, shooting the scoop will give the award associated with the current Wizard Travel level the player is at. The player starts the game qualifying level 1 (Broomstick) and the methods of travel & awards increase in value over the course of the game.
Geminio as listed in this section is a “duplication charm” represented by a playfield multiplier that lasts 30 seconds and increases in value every time it is used during a game. While Geminio is active, trophies will cover the display with every switch hit, and disappear once time runs out. The awards are as follows:
- Level 1 - Geminio (2x)
- Level 2 -
- Level 3 - Geminio (2.5x)
- Level 4 - Light extra ball
- Level 5 - Geminio (3x)
- Level 6 - Extra credit mania
- Level 7 - Geminio (3.5x)
- Level 8 - Geminio (4x)
Potions:
During single-ball play, whenever the ball falls into the hole near the cauldron, it will advance one shot towards starting Potions. The first Potions mode requires two hole shots to start, increasing by 1 each time the process is started.
Potions are this game’s mystery award. Three awards are shown on the display corresponding to a different shot on the playfield: from left to right, the left ramp, center ramp, and right orbit. Shooting any of the three shots will “lock in” the potion, and hitting the locked-in shot two more times will complete the potion and give the labelled award.
Many different awards are available from Potions that can heavily impact the game state:
- Muggle Points (value TBD)
- Add Ball Saver (30 seconds)
- +2 Tilt Warnings
- Auto Relight Diagon Alley (After visiting Diagon Alley, it will immediately relight)
- +1 Bombtastic Bomb
- Increase Knockturn Alley Value (+50M)
- Explore Hogwarts Jackpots Stay Lit (the same shots can be repeated again)
- Advance Quidditch Position (to Seeker)
- Spot Snitch (completes the current Quidditch match)
- Add Quidditch Goals (between 4 to 6 goals)
- Max Geminio Next (next playfield X starts at 4x)
- Add Library Visits (+5x)
- Hold Library Visits (to the next ball)
- Extra Credit Boost (add points to base extra credit value)
- Extra Credit Mania (starts the timed mode)
- Forbidden Forest Multiplied (the next 5 Forbidden Forest shots score 2x, 4x, 6x, 8x, 10x)
- 3x Potter Frenzy (immediately starts the mode at 3x value)
- Light 5x Fawkes (next Fawkes ball save chance scores 5x)
- Protego Maxima (unlimited uses of Protego for the rest of the ball)
- Light Extra Ball (if potions mode has already been played this game)
- Spot Battle of Hogwarts Progress (spots 1 multiball towards lighting this mode)
- Spot Horcrux (spot 1 Horcrux towards lighting The Boy Who Lived, the player gets no choice about which Horcrux is spotted)
Potter Frenzy:
This mode starts after spelling HARRY at the return lanes 4 times, regardless of whether his Golden Trio lock is lit or not. For the next 40 seconds, all switches score a random value between 50k and 100k points, and a different voice clip from the movies of a character saying “Potter”.
Fawkes (Left Outlane Ball Save):
Shoot the right orbit enough times to light Fawkes at the left outlane. If the ball drains down the left outlane, Fawkes will start and the player must hit three unique shots within 20 seconds to save their ball.
If the player hits all three shots, victory laps will start for +10 additional seconds at the shots that were used to save the ball. A super jackpot is available after completing all three shots.
Protego (Right Outlane Ball Save):
Spell HARRY at the inlanes to light Protego. Protego will save any ball at the right outlane and is indicated by the colored LEDs below the shield flashing.
Protego will also automatically activate from weak right spinner shots, or if the ball drains down the right outlane while ball save is active. These activations don’t count towards disabling Protego.
Horcruxes:
As in the books and movies, there are seven horcruxes, which are the key to Voldemort’s survival. Collecting each of the seven is accomplished by reaching specific goals within the game:
- Diary: visit Flourish & Blotts, and succeed at spell training
- Ring: collect a Super Jackpot in Explore Hogwarts multiball
- Locket: collect 10 total allies
- Cup: collect a Super Jackpot in Golden Trio multiball
- Diadem: collect a Super Jackpot in Quidditch World Cup multiball
- Harry: collect all 3 Deathly Hallows in the Deathly Hallows mini-wizard mode
- Nagini: start Death Eater multiball
The horcruxes can be collected in any order. Collecting all seven horcruxes activates The Boy Who Lived wizard mode, in which you battle to defeat Voldemort.
Extra Balls:
Light extra balls at the hole behind the upper flipper by:
- Making the level 3 skill shot behind the upper flipper
- Defeating a Death Eater (once per game)
- Reaching Wizard Travel level 4
- Lighting one from Potions
- Collecting the resurrection stone during The Deathly Hallows
Quidditch Bonus:
Bonuses are given for all players’ Quidditch performance at the end of the final ball of the game:
- 150 points per Snitch caught
- 10 points per goal
all multiplied by the position value that they set with the first left ramp shot of the game (beater - 100k, chaser - 150k, keeper - 200k - seeker - 300k).
During multiplayer games, the game keeps track of the Quidditch MVP - the player who scored the most points from Quidditch during a game. The Quidditch MVP receives 10M x the number of players who were in the multiplayer match, up to a max of 40M.
Wizard Modes:
The Deathly Hallows (Mini-Wizard Mode)
Per book and movie lore, the three “Deathly Hallows” are the Invisibility Cloak, the Resurrection Stone, and the Elder Wand. Earning all three qualifies the Deathly Hallows mini-wizard mode. The requirements for each are:
- The Invisibility Cloak: spell H-A-R-R-Y at the return lanes 3 times.
- The Resurrection Stone: earn 200 Quidditch points
- The Elder Wand: complete 4 lessons in a school year term
Once all three Deathly Hallows have been collected, the mini-wizard mode can be started by shooting the scoop. The mode provides 18 seconds of ball save but otherwise lasts until you complete the mode, drain, or the mode times out. You start with 90 seconds on the clock. Shoot 5 blue shots to collect the cloak, 5 purple shots to collect the stone, and 5 red shots to collect the wand. Note that the upper playfield ramp can be looped to collect multiple purple shots. Each yellow shot advances the playfield multiplier by 0.25x (apparently up to a max of 8x). The 1st item collected awards 50M points times the playfield multiplier, an extra ball, and adds 10 seconds to the clock. The 2nd item collected awards 50M points times the playfield multiplier, +10x extra credit multiplier, and adds 15 seconds to the clock. The 3rd item collected awards 100M points times the playfield multiplier and the Harry horcrux.
The Battle of Hogwarts (Mini-Wizard Mode)
Playing four different multiballs qualifies The Battle of Hogwarts mini-wizard mode. This is a multi-stage mode in which you must achieve a defined number of playfield feature shots (spinners, targets, ramps, jets & orbits) in each stage. The required number of each feature will appear in five on-screen badges, which count down as you achieve shots. When the required number is complete, the badge will be lit blue and say “completed.” To move to the next stage, you must complete 3, 4, or 5 features, depending on the stage and difficulty level. (Ex., To advance to stage 2, you would need to complete 3 of the following: 65 spinners, 6 targets, 5 ramps, 30 jets, 3 orbits.) Completing stages 1, 2, and 3 awards 25M, 50M, and 75M, respectively.
Battle of Hogwarts is a multiball mode, which starts with all 6 balls in stage 1. As you progress to stages 2, 3, and 4, the add-a-ball/ballsave feature will add 3, then 2, then 1, additional balls into play up to the max of 6 balls in play. Shoot under the upper flipper to start a timed (ex. 13 seconds) unlimited Protego shield at the right outlane. If you drain down to a single ball, the mode ends.
The Boy Who Lived (Wizard Mode)
When all seven horcruxes have been collected, The Boy Who Lived wizard mode will be lit. Shoot the center lane to start the mode. You must then destroy all seven horcruxes, in the same order as the movies, and finally defeat Voldemort to win the mode. Each horcrux requires a certain number of shots to destroy:
- Diary: shoot 2 orange shots
- Ring: shoot 3 purple shots
- Locket: shoot 4 pink shots
- Cup: shoot 3 white shots (multiball)
- Diadem: shoot 3 blue shots
- Harry: shoot 3 red shots
- Nagini: ??
Destroying the seventh horcrux begins the final battle against Voldemort. [Voldemort battle details needed]